Preview Tutorial
Node.jsの場合、プレビュー画面を開くためのUIはユーザーが用意する必要があります。
ここでは、フロントにReactを使う想定でプレビューの設定例をガイドします。
Node.JS
const SEACRET_KEY = "SEACRET_KEY";
const payload = { subject: "Cool Subject", body: "# Headline\n This is a **Markdown** text\n ", to: [ ] };
const getDraft = async (request) => { const apiKey = request.headers.get("API-KEY"); if(apiKey !== SEACRET_KEY){ return new Response("error") } const url = new URL(request.url); const contentId = url.pathname.substring(url.pathname.lastIndexOf('/') + 1) const draft = /// contentIdを使ってデータベースから下書きを取得する。payloadと同じ型だとする return new Response(JSON.stringify(draft))}- まずはVellでプレビュー タブを開き、
Add Newを押してCustomを選択します。 - 追加された項目を選択し、
Headersに、キーがAPI-KEY、Valueが上記のSEACRET_KEYのヘッダーを追加します。Endpointに、上記のgetDraftを処理するためのエンドポイントを入力します。 - VellからNode.js側には以下のようなURLでアクセスし、下書きを取得します。https://your-service.com/<contentId>
Endpointにはhttps://your-service.comの部分を入力してください。
React
const PREVIEW_ID = /// VellからコピーしたPreview ID
const contents = [    { id: "123", subject: "Cool Subject"},    { id: "456", subject: "Good Subject"},    { id: "789", subject: "Super Subject"},]
export default function Contents() { return contents.map((content) => { return <a href={`https://vell-letter.com/preview/${content.id}?previewId=${PREVIEW_ID}`}> <div> {content.subject} </div> </a> })}- Vellでプレビュー タブを開き、
Node.jsを設定する項目を選択します。 Preview IDの値をコピーし、上記のPREVIEW_IDにセットします。- contentのリンクを開くとVellのプレビュー画面が立ち上がり、Node.js側にアクセスし下書きを取得後、画面に表示します。
ここではこちらの続きとしてmicroCMSのプレビュー設定をガイドします。
- まずはVellでプレビュー タブを開き、
Add Newを押してmicroCMSを選択します。 - 追加された項目を選択し、
Preview IDの値をコピーします。 - 次にmicroCMSに移動し、API設定の
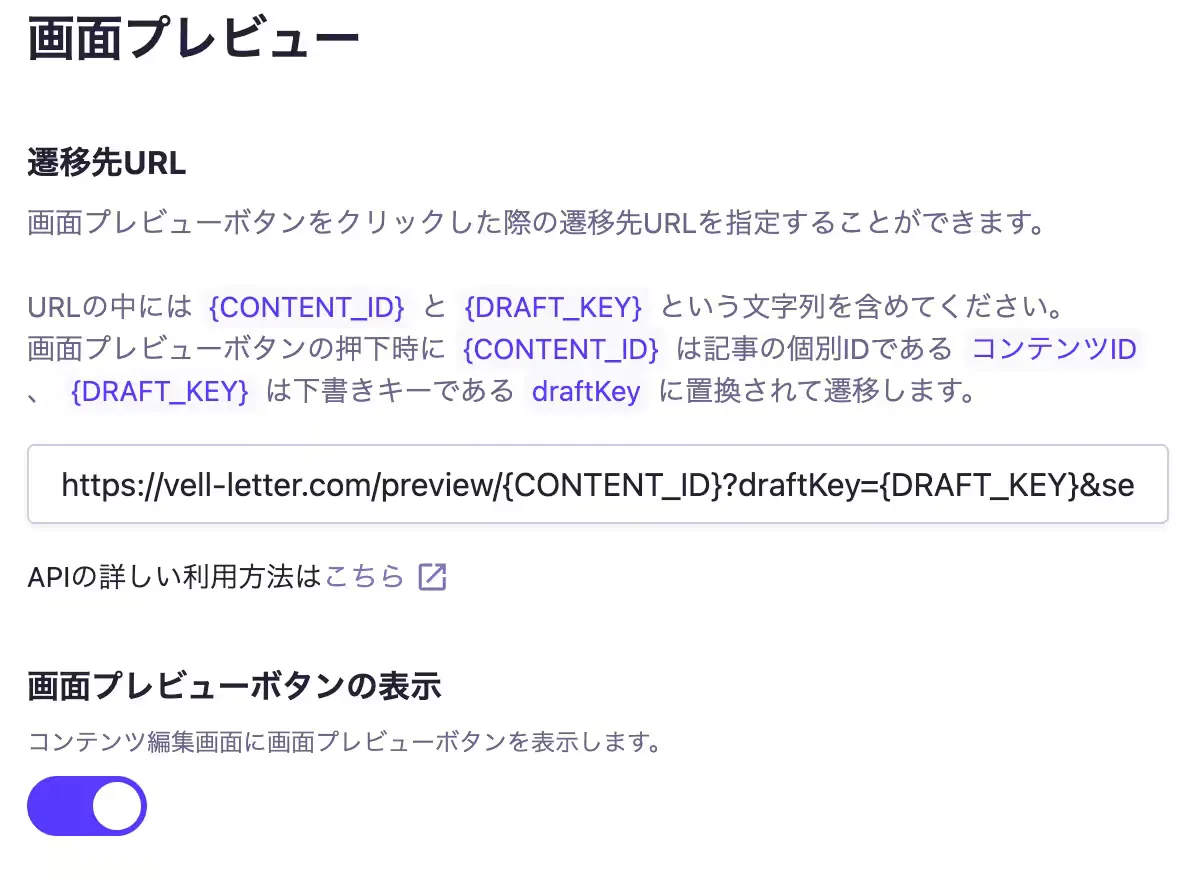
画面プレビューを開きます。 - 遷移先URLにこちらのURLを入力します。https://vell-letter.com/preview/{CONTENT_ID}?draftKey={DRAFT_KEY}&previewId=PREVIEW_ID
PREVIEW_IDの部分は先ほどコピーしたPreview IDの値に置き換えてください。そして変更するで保存します。
- 次に
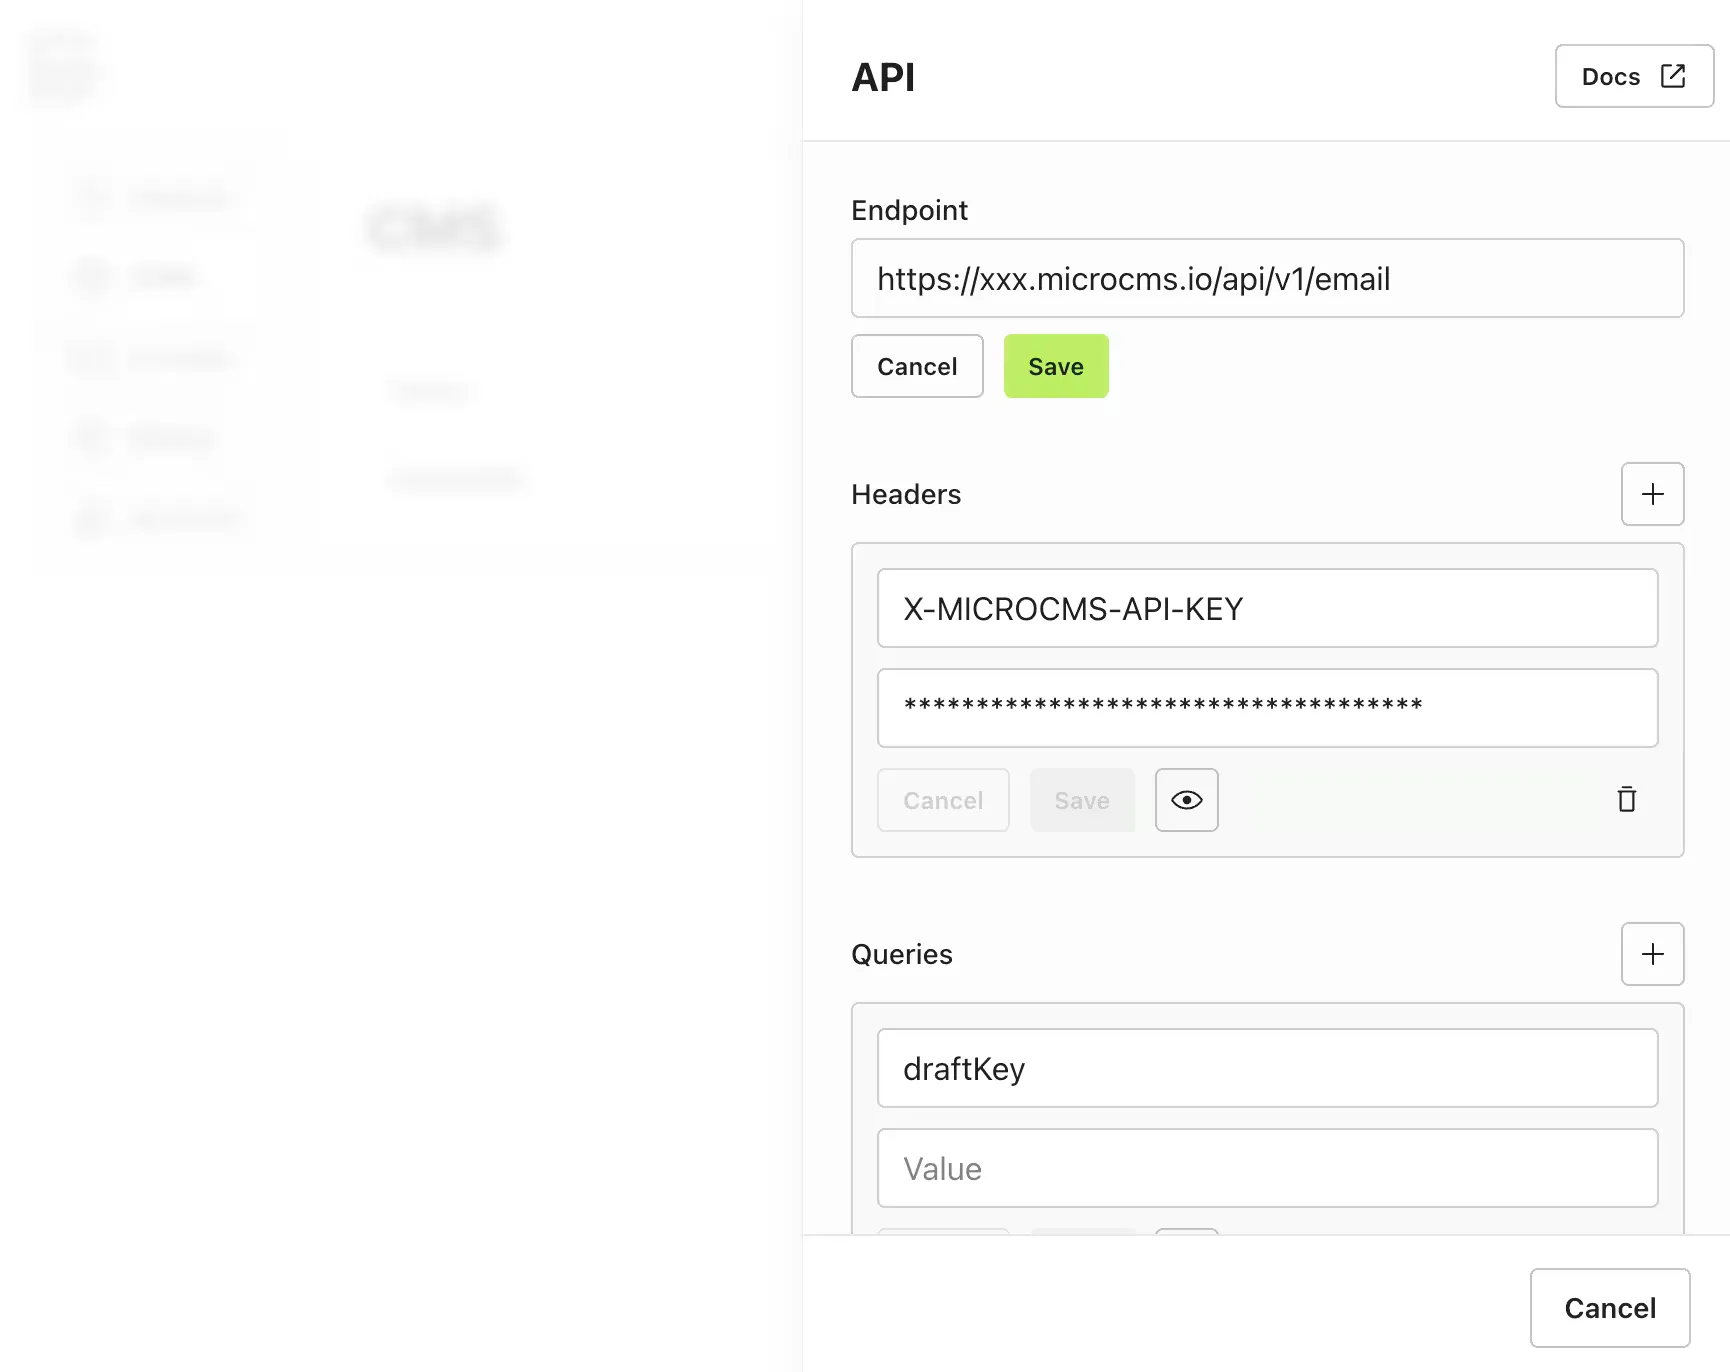
基本情報でAPIのエンドポイントを確認します。こういったURLになっているはずなので、これを控えておきます。(https://xxx.microcms.io/api/v1/email)xxxの部分は各サービスのIDが表示されています。 - 次に、左上にある歯車アイコンを押し、サービス設定に移動します。そして
APIキーを開きます。 defaultというAPIキーがあるので、その値を控えておきます。- Vellに戻り、
microCMSを設定しているプレビューを開きます。 Endpointに、先ほど控えたmicroCMSのエンドポイントを入力します。次に、HeadersにX-MICROCMS-API-KEYというキーを持つヘッダーがあるので、そのValueに先ほどのdefaultのAPIキーの値を入力します。
- microCMSに戻り、コンテンツの編集画面を開きます。もし
公開中になっていたら下書き状態に戻しておきましょう。その後、画面プレビューを押して入力中のコンテンツのプレビュー画面が表示されれば成功です。
ここではこちらの続きとしてNewtのプレビュー設定をガイドします。
- まずはVellでプレビュー タブを開き、
Add Newを押してNewtを選択します。 - 追加された項目を選択し、
Preview IDの値をコピーします。 - 次にNewtに移動し、
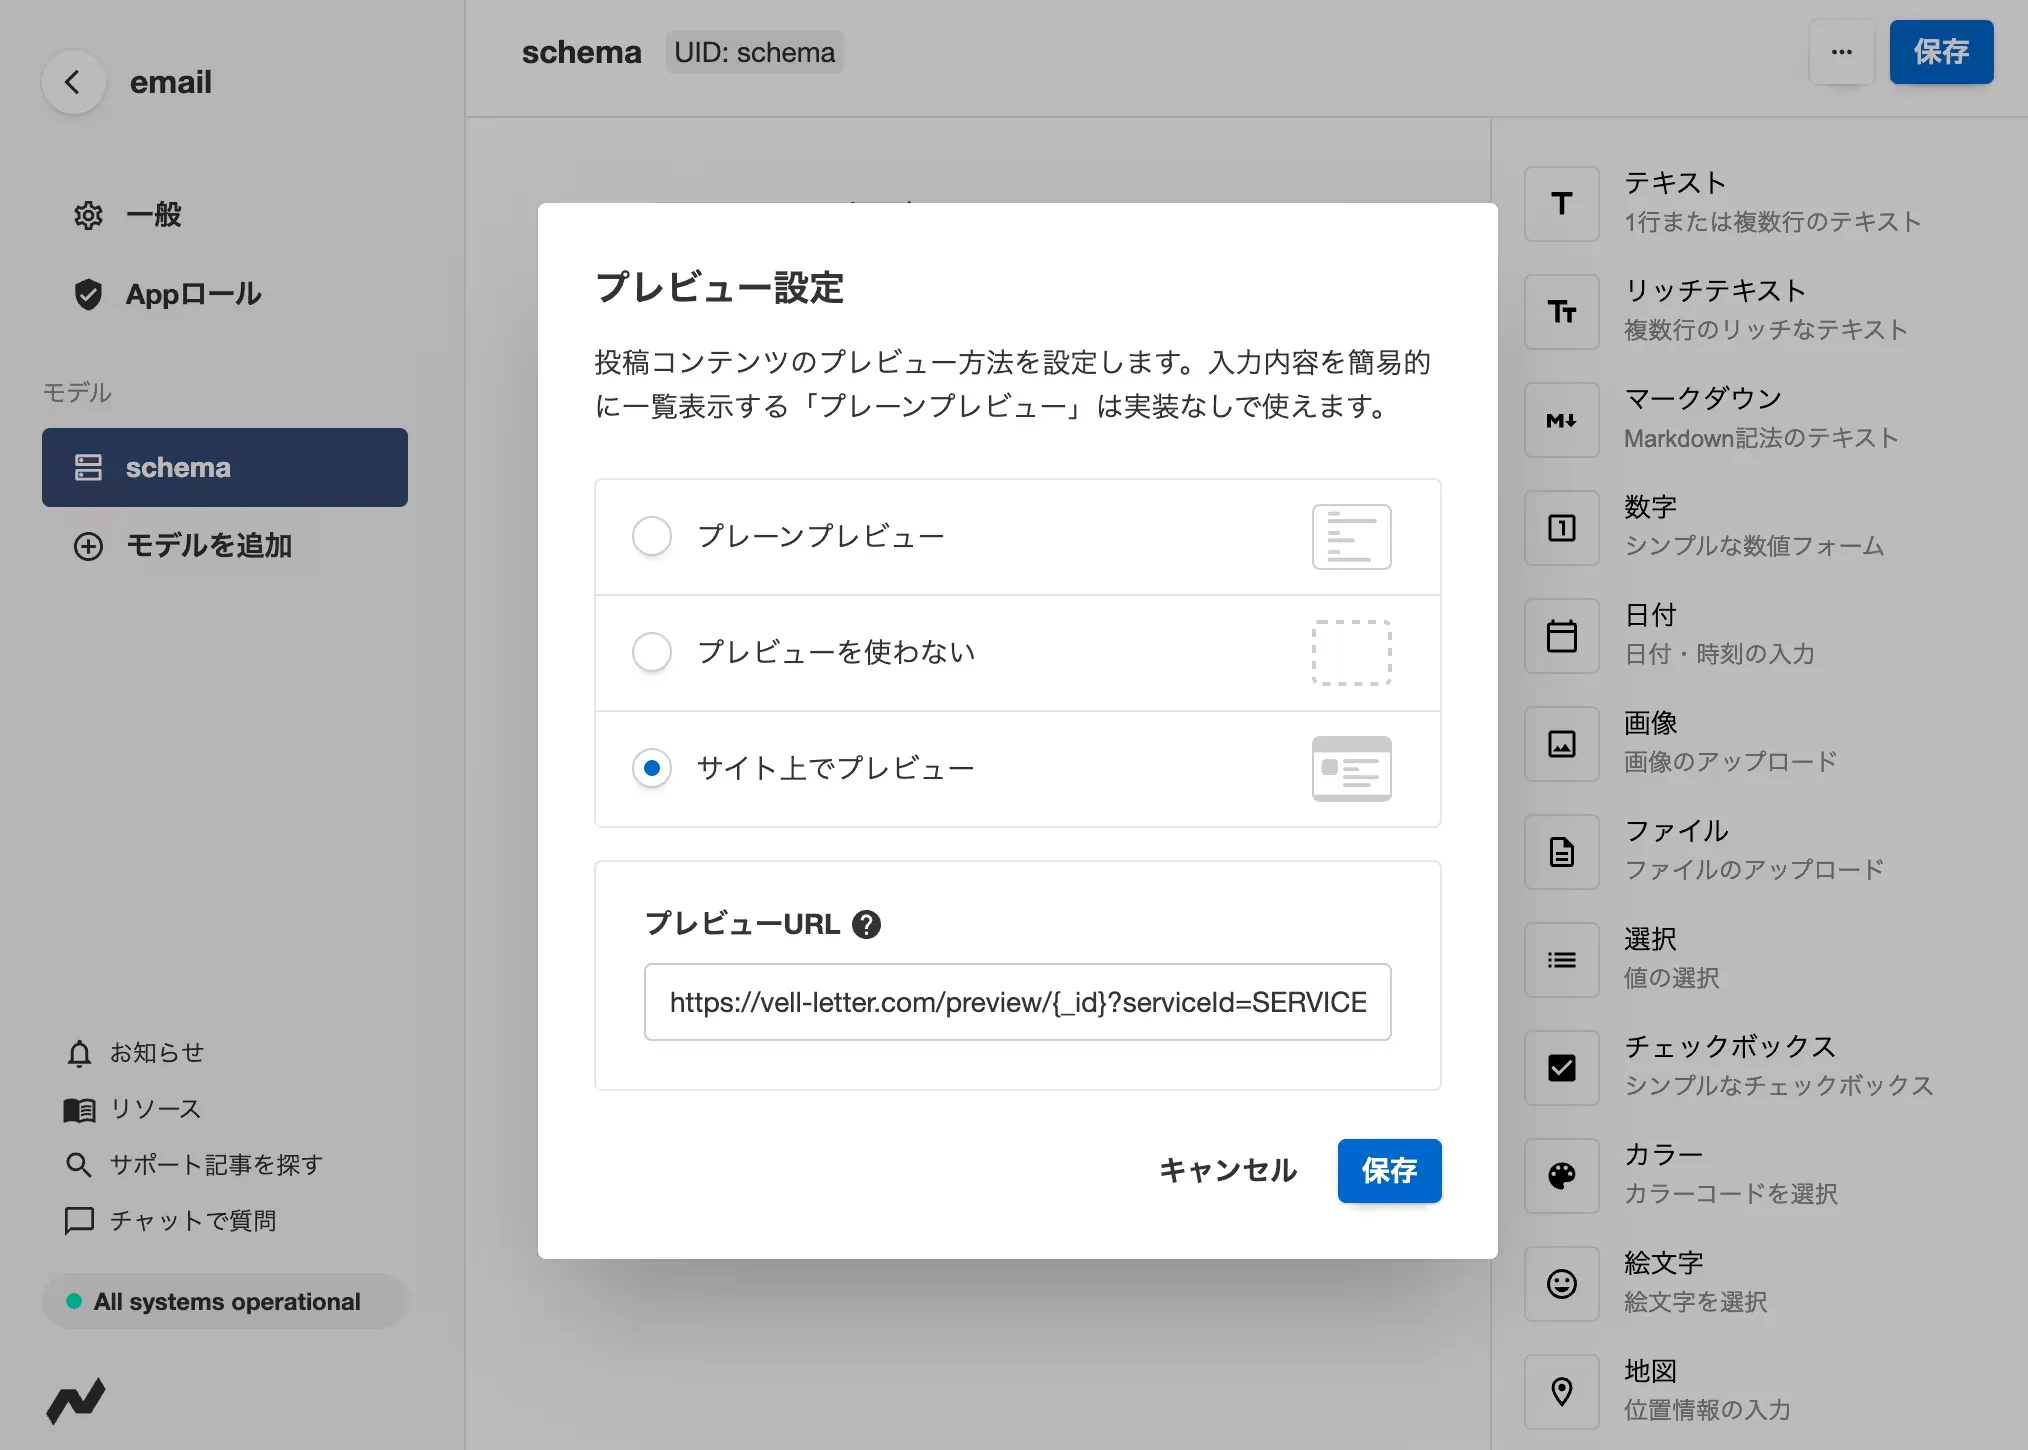
emailからschemaに移動します。 - 右上のアイコンから「プレビュー設定」を開き、
サイト上で開くを選択します。そしてプレビューURLにこちらのURLを入力します。https://vell-letter.com/preview/{_id}?previewId=PREVIEW_IDPREVIEW_IDの部分は先ほどコピーしたPreview IDの値に置き換えてください。そして保存します。
- 次にスペース設定に戻り、「一般」を開きます。そして
スペース UIDの文字列を控えておきます。 - 次に「APIキー」を開きます。そして
Newt API Tokenに新しいトークンを作成します。名前は自由につけてください。取得対象にするAppはemailにして作成します。追加されたトークンの値を控えておきましょう。 - Vellに戻り、
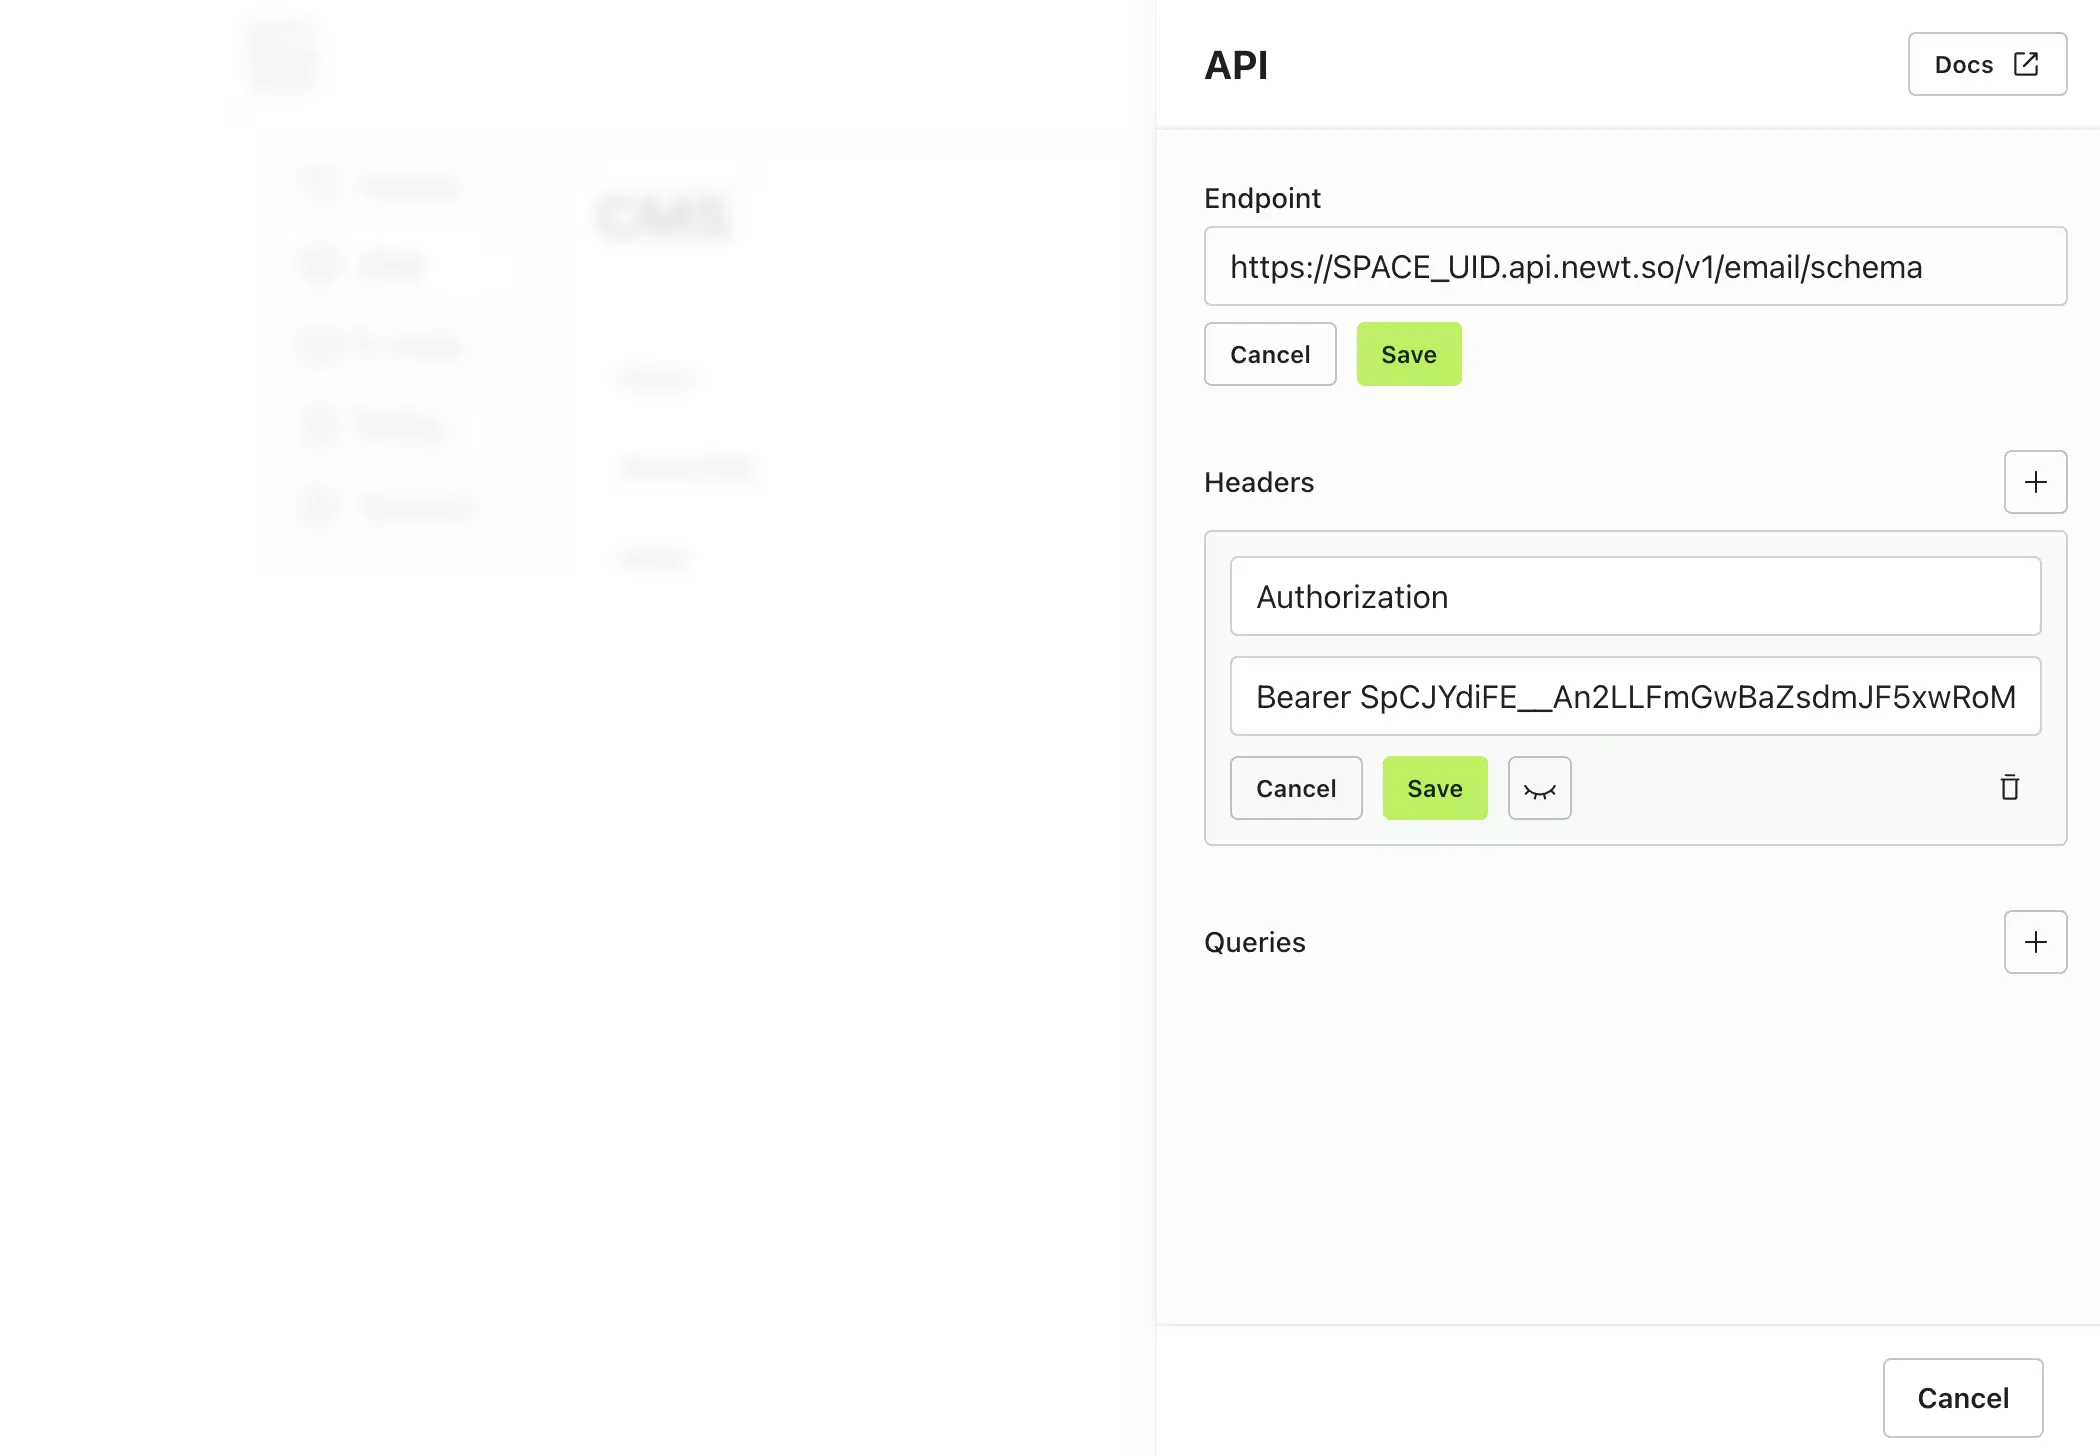
Newtを設定しているプレビューを開きます。 Endpointに、このようなURLを入力します。https://SPACE_UID.api.newt.so/v1/email/schema。SPACE_UIDの部分は先ほど控えたスペース UIDに置き換えてください。 次に、HeadersにAuthorizationというキーを持つヘッダーがあるので、そのValueにBearer TOKENを入力します。TOKENの部分は先ほどのトークンの値に置き換えてください。Bearerの後の半角スペースを忘れないようにしましょう。
- Newtに戻り、コンテンツの編集画面を開きます。もし
公開中になっていたら下書き状態に戻しておきましょう。その後、プレビューを押して入力中のコンテンツのプレビュー画面が表示されれば成功です。